Sunday 9 December 2012

How to make pretty gift bows

This is so much easier than you would think.  I thought it was going to be really fiddly.  Aparently not.

Cut 6 strips if double sided patterned paper to 3/4" wide

Cut 3 to 10"
2 to 8.5"
1 to 4"


Twist the strips to creat two loops at the ends and staple with a small staple in the middle.

Layer the loops starting with the largest loops and adhere using glue dots or glue. Finishing with the smallest single loop in the centre.


It really is that simple, I did this on the couch with a 3 year old "assisting" me.

Never again do you need to worry about having no ribbons or bows in the house you can just whip this up when needed

My elf daily lapbook

While searching you tube for mini albums I came across this lap book tutorial by Kathy Orta. I instantly fell in love with it. Lots of hidey holes and places for matting and Its full of interactive goodness for the kiddies to enjoy looking through it. I decided the mint twist collection by Kaisercraft would be perfect to do an elf on the shelf December daily as it was our first year with Alf our elf as part of our family.

However I struggled a bit while going along with the tutorial firstly here in Australia our manilla folders are quite different to the ones she used (so I had to adapt a little), then there were a few oh whoops I need to go back a step which was fine but I learnt that I am better following something in written form than video. I also adapted a couple of things to suit me better.

I hope you enjoy making this album as much as I did. It was so much fun.

~What you will need~
6 manilla folders (I got a 50 pack from office works for about $6)
1\2" double sided tape (have a spare roll on hand I used a fair bit)
1\4" double sided tape (I didn't find this strong enough so only used it for matting)
6 - 10 pieces of 12x12 plain colour cardstock in coordinating colours (you may use more or less depending on what pockets you incorporate)
A collection pack (I used Kaiser-craft Mint twist)
12x12 mint twist number sticker sheet
A packet of mint twist dies
Manilla tags (I got mine from the newsagent's or you can make them)
Corner rounder (optional)
Paper trimmer
Score pal (or something similar)
Scissors
Ruler
Bone folder
Velcro

I know that looks like a lot of materials. But its so fun you won't regret it. So get your goods together and stay tuned for the next chapter.


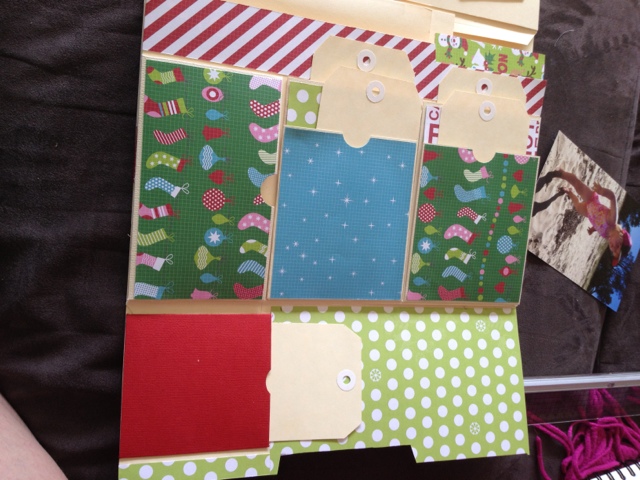
These are just a few photos on the unfinished product. I'll be sure to upload more when can take some.

Family friendly glitter Christmas baubles

Hi All,

I have desperately been wanting to make some glitter baubles for our tree with the clear glass baubles you can get from spotlight and lincraft, but, I just havent been able to hit the technique on the head.  I tried glue (dont bother the glue doesnt dry and it goes all streaky and settles at the bottom of the bauble), kindy glitz (I wasnt happy with how long it took to cover the bauble or the cost factor.).  Then I came across a blog that used reinkers (Fireflies and Jellybeans), PROBLEM I dont have any reinkers... so the more I thought about it and how if I went and bought some reinkers then again the cost factor was going to go up, and came up with a solution.  A solution which makes it safe for the kids to help.  I think as far as age goes, 4 and up is a good age bracket to aim for.


You will Need~
Glitter
Food Colouring
Clear glass baubles
and a tin or glass to hold the bauble in place. (the passionfruit pulp tin was a perfect size)

Uncap the top of the bauble and set it aside.   Resting the bauble on the tin pour some food dye into the bauble


Place your finger over the hole and swirl the dye around to coat the whole inside of the bauble (you may want to use some gloves for this if your worried about your dye staining your fingers)

Tip the bauble upside down into the tin, and let the excess dye drain from the bauble.

Tip some glitter into the top of the bauble, be generous with the amount of glitter you use you want to be able to coat the whole inside.

and shake to cover the entire inside with glitter

Tip the bauble again tapping the bottom to get all the excess glitter out (if you wat to keep the excess glitter tap it onto a piece of paper with a crease down the middle so you can easily put it back in the tube.)

And there you have it pretty VERY sparkling baubles.  


Have fun making these, I know I did.. I'm a sucker for anything shiny :)

Thanks for visiting

Mel