Sunday 16 November 2014

Christmas Mugs

This year I am endeavouring to make as many presents as possible. Who am I kidding every year I start out with the best of intentions usually falling in a heap by the start of December.

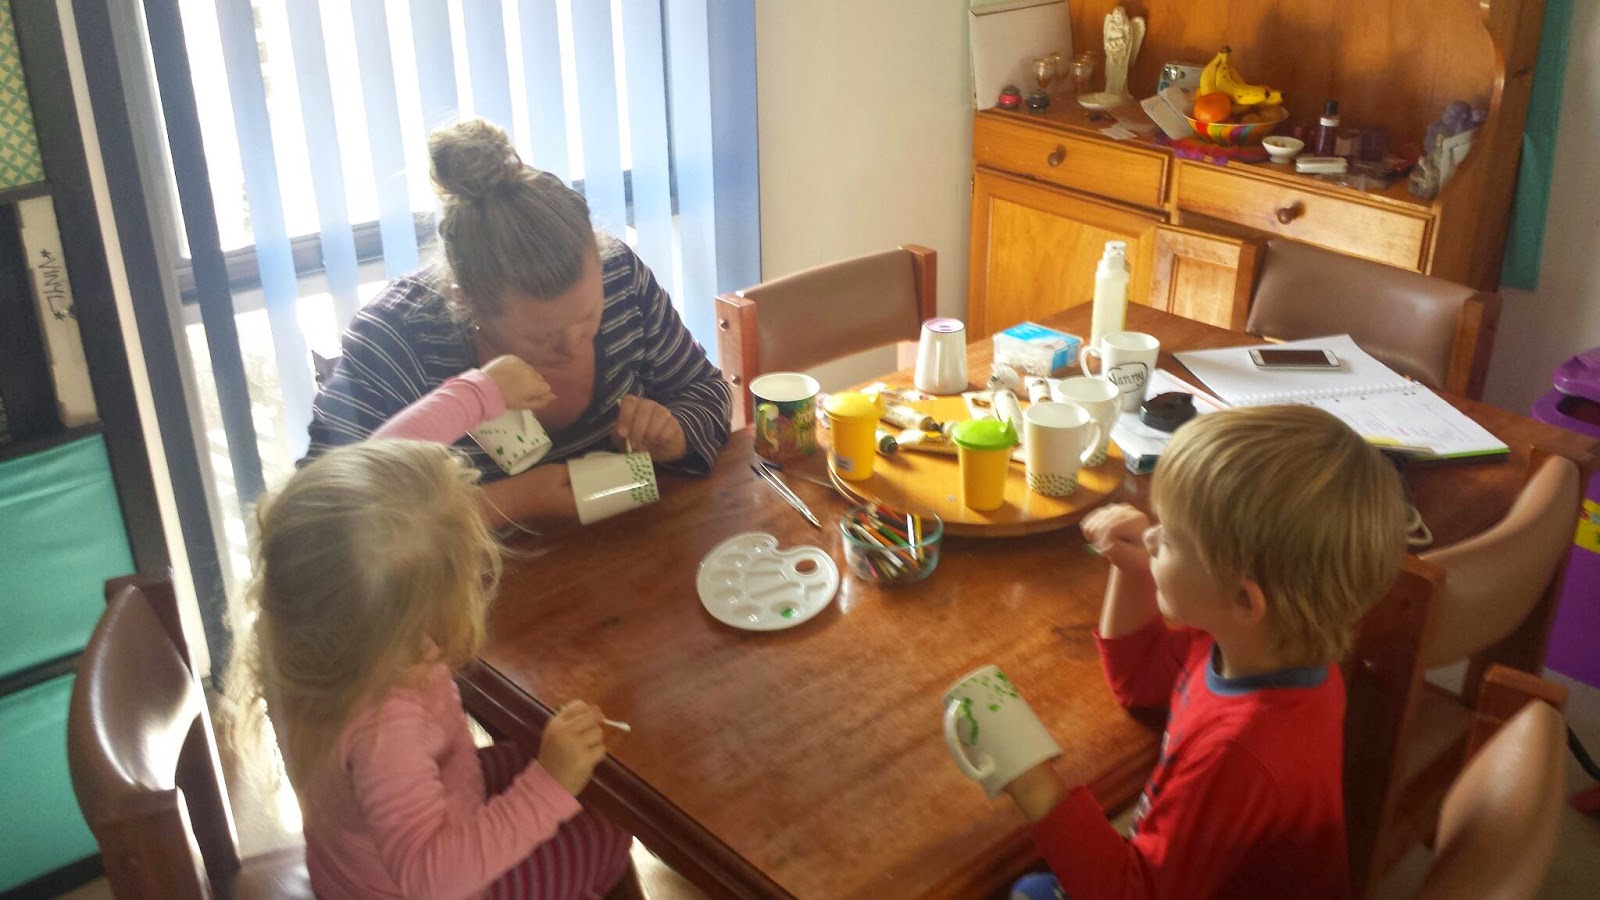
So yesterday I sat down with the kids and we made a start. We got going on personalised Christmas mugs for the great grand parents. We will fill them with chocolate and wrap them in cellophane.

Do you want to make your own? Here's what we did.

What you'll need

jo sonjas folk art acrylic paints
plain white coffee cups (we got ours from kmart for $1 each)
a fine paint brush
a paint pallet
some cotton buds
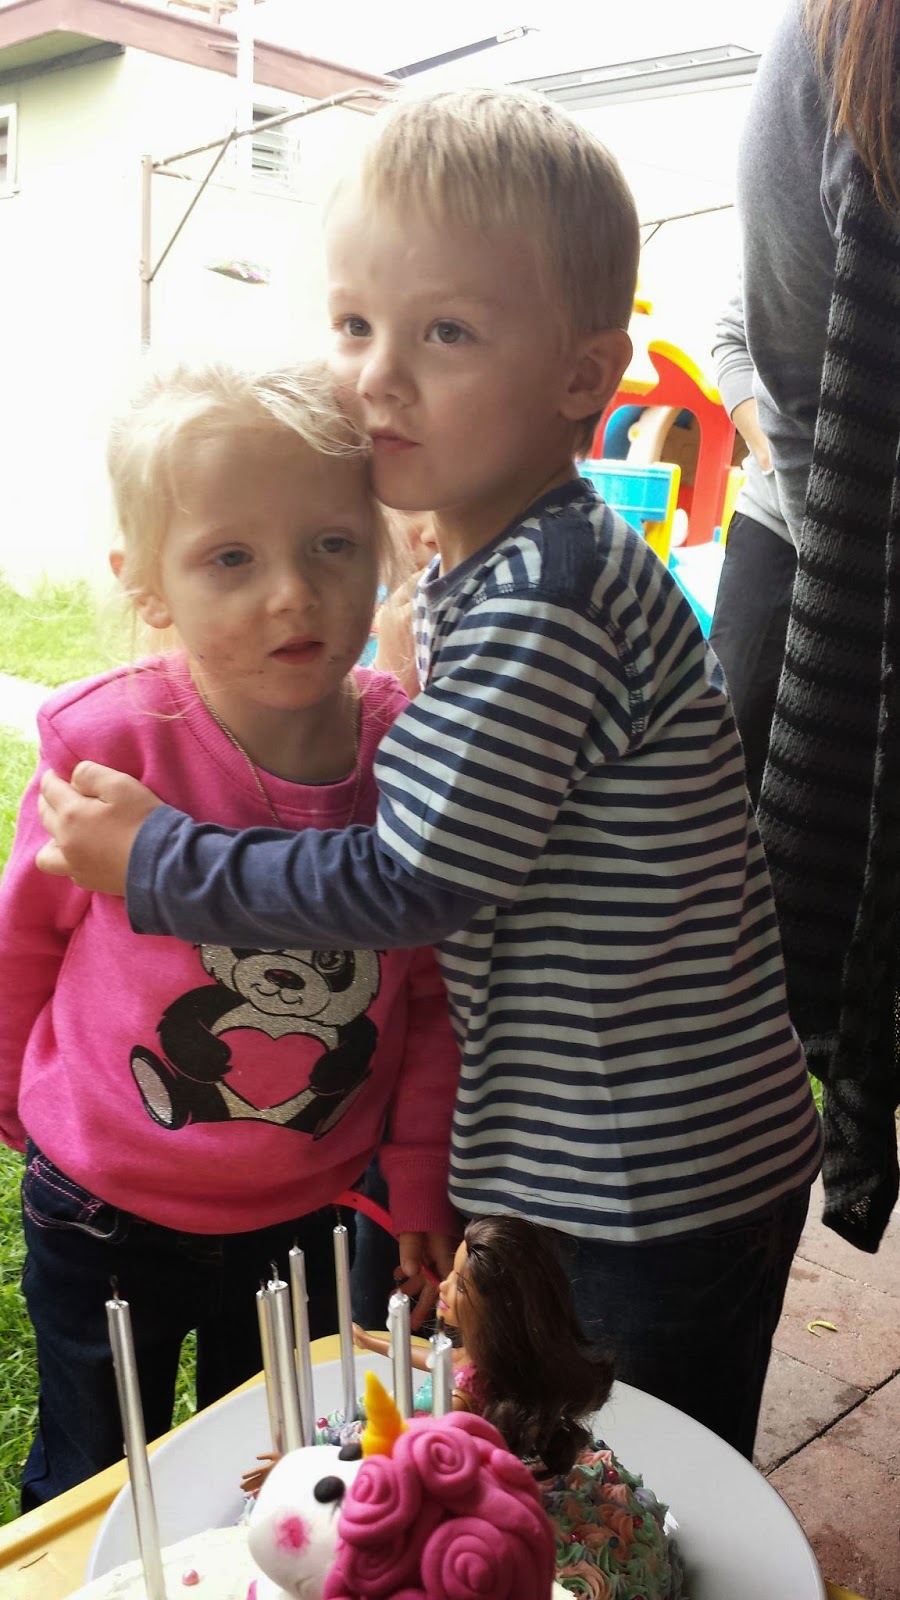
and extra helpers (this works well if you helpers have good listening ears)

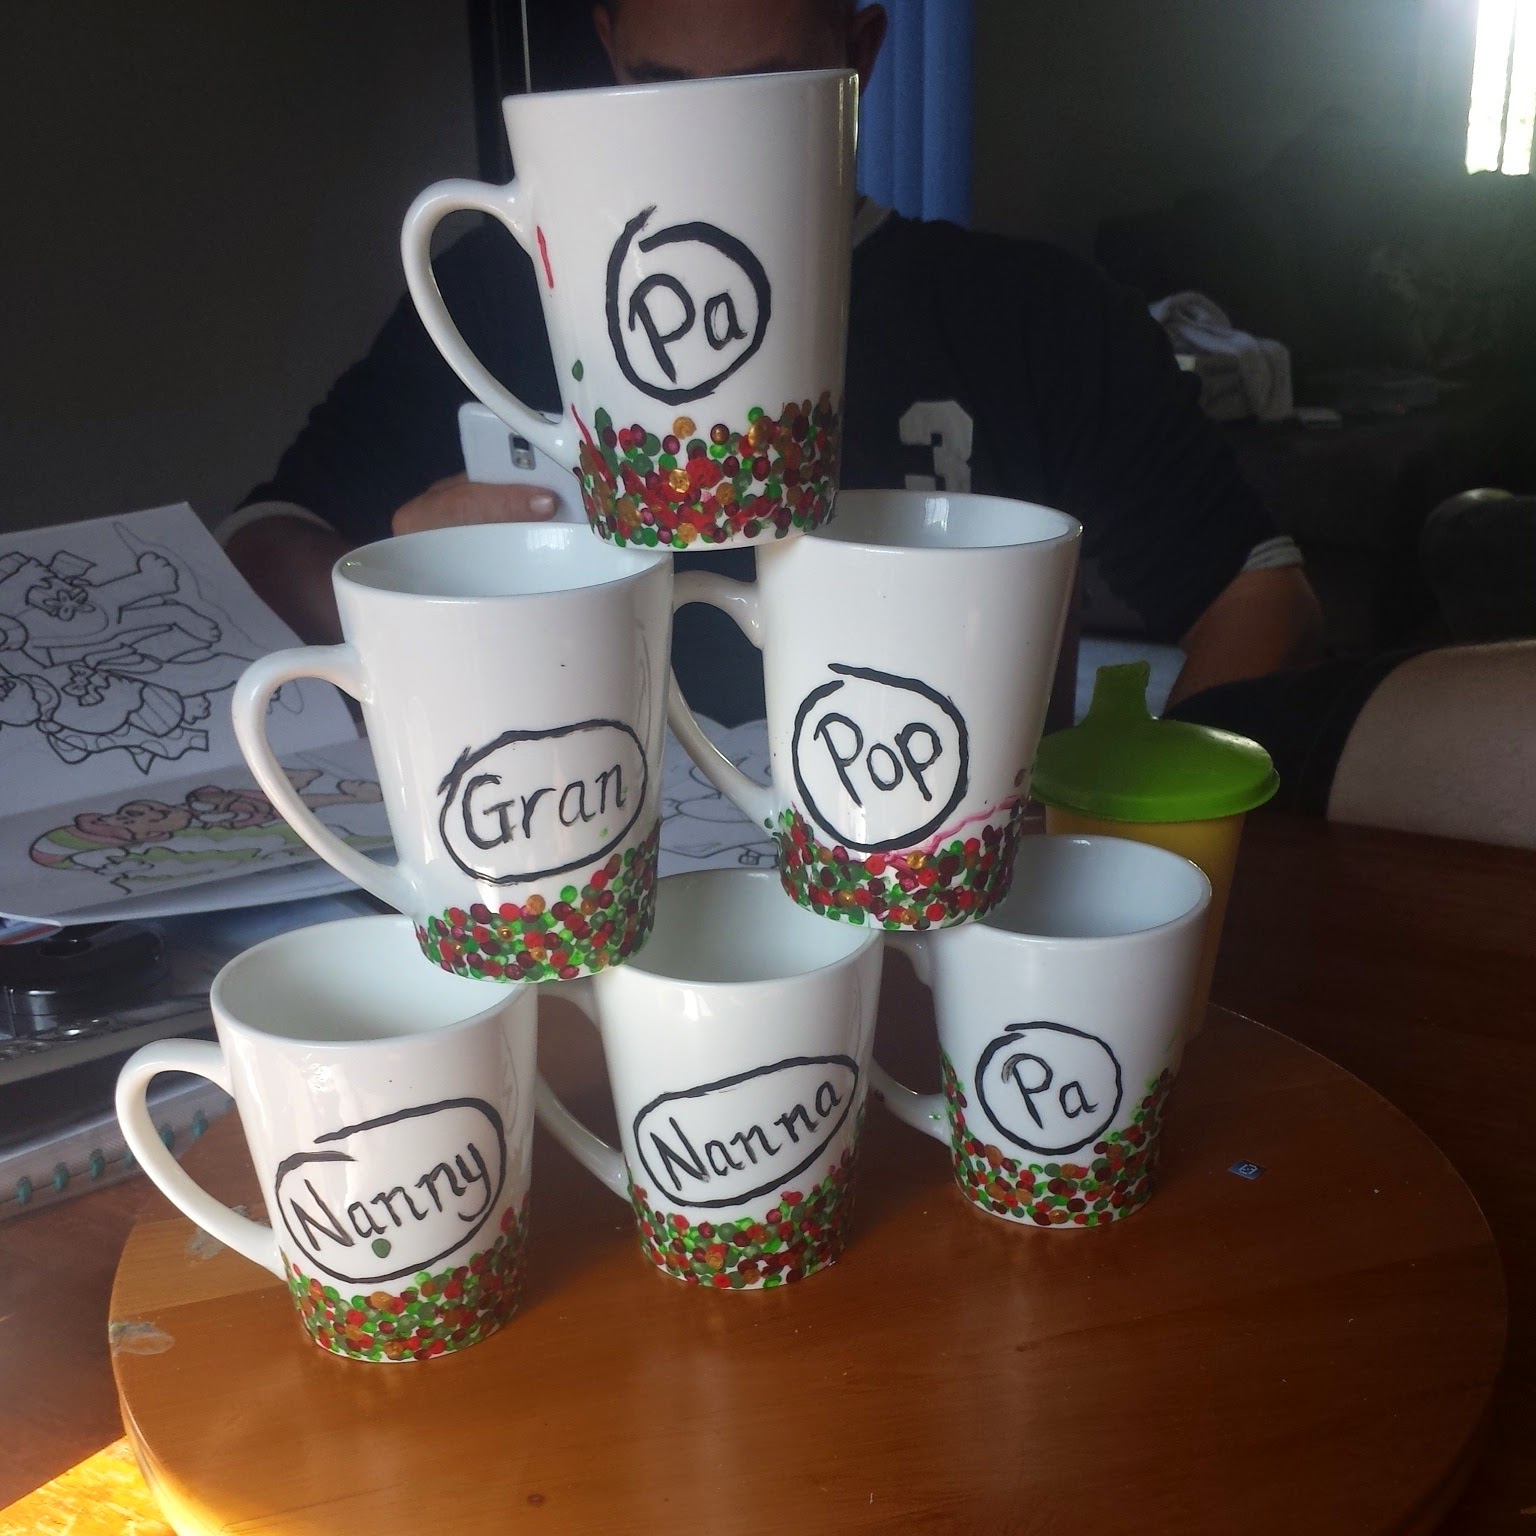
I started by painting the recipient's names on the mugs and circling them.

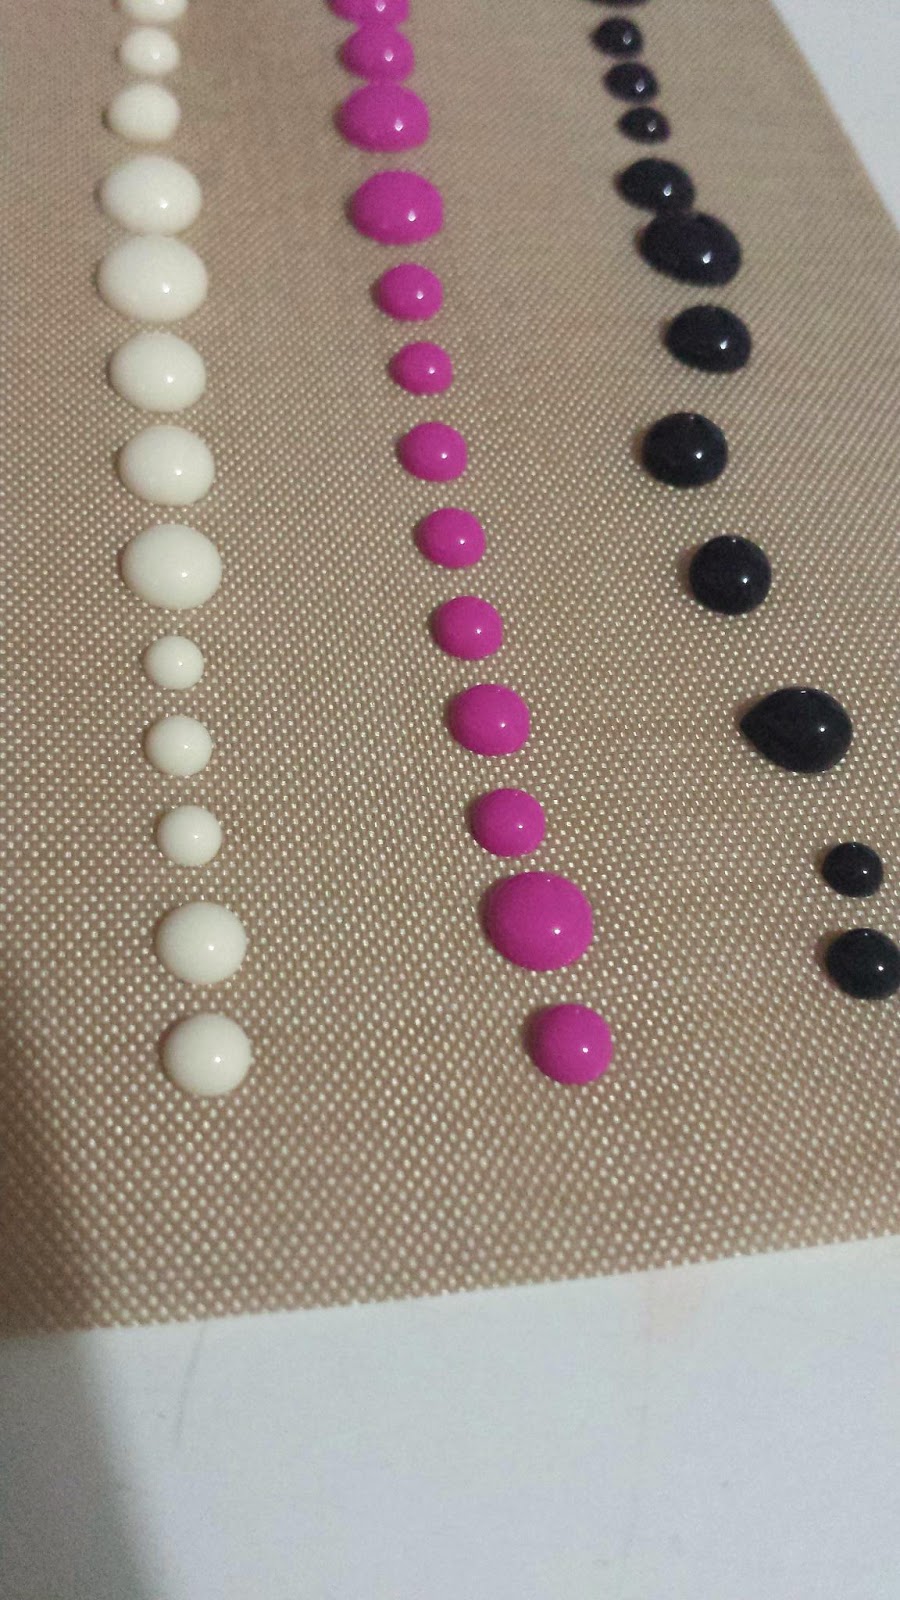
Then my helpers joined me. I squeezed out one colour at a time and we started dotting with the cotton buds. when you are happy with the coverage leave it to dry for a couple of minutes and move onto your next colour.

Once you are happy with the result let it air dry for half an hour (mine sat for about 3 hours but I got distracted with dinner prep)

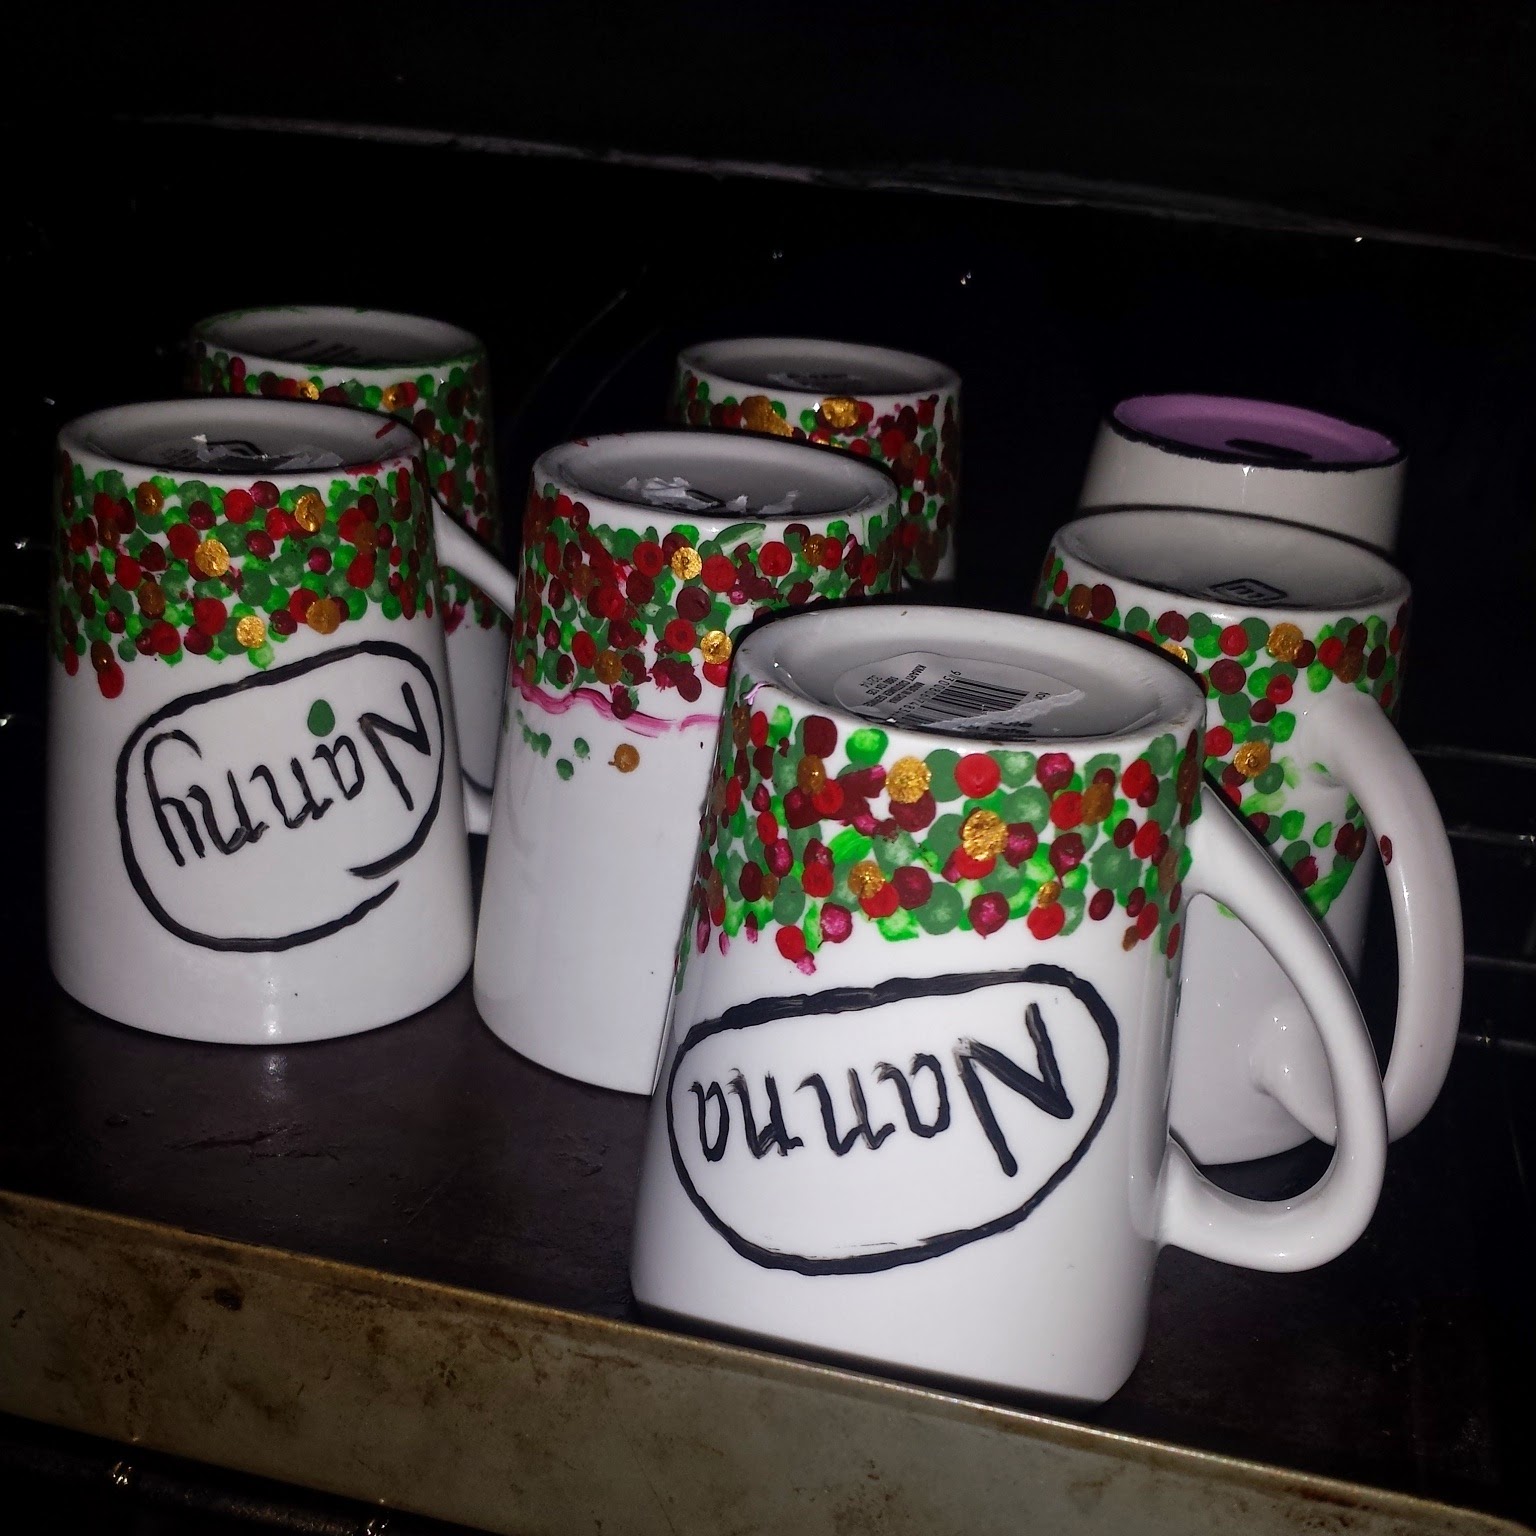
preheat your oven to 180°c and place the mugs in there on a tray for half an hour. pull the out and let them cool completely.

give them a wash in warm soapy water.

The important stuff

do not use a scourer to wash them.
gentle hand wash only.
have a grown up do the oven part.

This was a really fun activity. that kept the kids entertained for a couple of hours (we made 6 mugs) with a lovely result. The perfectionist in me twitched a little at the imperfections in the cups. but as this is a gift from the kids to their great grandparents I embraced it.

GO ON HAVE SOME FUN WITH IT!!!

This week

This week has been a whirlwind. Extra hours at work, spring cleaning (with a 3 and 5 year old, not easy) and school transition days to name a few.

However i still managed to squeeze in some time to craft. On Wednesday i headed to my dear friend Carolyn for a crop. It was slow starting. but I managed to get 3 layouts done and a couple of pages in my December documented smash book ready to go. i also did a bit of stamp organising as well. Tonight after running around all day returning the carpet cleaner, painting some mugs with the kids for Christmas presents, heading into town to pick up a lay by (it was a lay by I couldn't have an audience for to collect) I sat down and couldn't find my oomph. I thought well there's a waste of a night. come 10.30pm my mojo kicked in (of course) and I completes a layout that has been weeks in progress.

I love this layout. I was inspired by a layout my friend Carol had done and asked her if I could scrap lift it. The problem was I didn't know what background paper she used. So out came my stamps and I created my own background paper using kellies stamps (have you bought from her? you simply must!) and some studio calico stamps. It turned out really well. I wasn't sure what photos I wanted to use until my nanna arrived this week with an envelope of stamps from when I was growing up. Bang!! There they were. The perfect photos.

Thursday 6 November 2014

Crochet hook handles

This winter I lost my scrapbooking mojo. But I found a love for crochet. I have taught myself watching you tube tutorials.  I have always wanted to learn. However being left handed I was impossible to find someone who was patient enough to reach me.

Over the cooler months I managed to complete 3 lap blankets, a couple of beanies, a pair of wrist warmers and a scarf.  Today I completed a beautiful chevron pram sized blanket for my oldest friends sister. (Its in the wash I type).

My biggest challenge with learning to crochet has been the extreme pain I suffer in my hands. I have a strong suspicion its arthritis (however I am too busy/lazy to pursue a diagnosis). I have seen some beautiful crochet hooks with wooden hand turned handles, they do however come with a price tag. I found some ideas to create my thicker handles using polymer clay. I wanted a multi coloured effect but didn't feel it was nessicary to buy (and have leftovers sitting in my craft stash).  Then yesterday while wandering through Kmart I found a day snow globe kit with polymer clay in it 4x2 inch squares of colour for $8. WINNING!

Needless to say it came home with me. I'm really happy with how they turned out I only did 4 of my hooks to see chow they went. All I did was roll out the colours into "snakes" like you would with playdough and twist them all together. Flattened it out and wrapped it around the hook. I ran a knife around the end the hook to create a pattern and bakes them at 130°c for 30 minutes.  I left them on the tray tool and voilà... Beautiful crochet hooks with handles.

Monday 3 November 2014

Crafting in december

Let's face it in an ideal world we all have grand plans of getting some crafting done for Christmas. Reality is if you don't get it done early it's not getting done. Between the shopping, baking, family outings and to be honest in Australia Christmas falls in summer so we dot want to be holed up in a room documenting life. We want to be out living it.

So the last 2 weeks have been focused on my Christmas albums (yes plural). I love Christmas and in the past I have had trouble cresting Christmas themed layouts. Not this year. So far I have 5 12x12 layouts ready and waiting for photos. And have completed my "things I love about christmas" based pages using the Heidi swapp believe album. I am loving how they are all looking.

Now all i need to do is decided whether my December daily is going to be integrated into my project life or in the smash book i have here???

Oh the decisions!

Sunday 2 November 2014

Christmas stamps

My favorite place to purchase my stamps is from my friend kellies over at kellies stamps. I love the design quality and service that I get from her.

I didn't quite realise how much I loved her stamps until we were at camp and I was showing her how I store my stamps and a large majority of them were hers. There aren't many of her releases (if any) I don't have.

So naturally when she released her Christmas stamps I was all over them. The small set I found perfect for my project life/December daily while the large set is ideal for cards.

As soon as they arrived I sat straight down and got creating. This year I had resolved to actually make my cards. Each year I plan to and I end up getting so bogged down with them they never make it out the door. So this year I was running with simple and quick.

All I did was cut some a4 card stock in half and got stamping. I finished them off with a couple of enamel dots (of course) and I love how clean they look.

Now to write them and get them in the post. What are you doing for your cards this year?

Finding my mojo

Lately around here I have rediscovered my scrapping mojo. For the last 8-9 months I just haven't been feeling it. My project life had stayed fairly up to date (sans journalling) but as for 12x12 layouts all inspiration had been missing. I even considered giving up all together. I mean what's the point of having all these supplies but not using them.
At the start of October I attended scrap camp. The weeks leading up to it I put all my efforts into prepping for camp. I had kits made up some were specifically to make 1 layout with the photo already chosen and others were there to make multiple layouts. I thought if anything was going to get me out of my slump this would be the way to go.
Its safe to say that camp and preparation truly did have the desired outcome. The challenges that the camp organisers set up also helped me with this. I managed to get 9 layouts done and had a lot of laughs along the way.
I had also made the decision I needed to scrap my stash. Sometimes (and you will probably find this yourself) we get so caught up in the purchasing side of scrapbooking. We get swamped in product. This was exactly where I was. I had so much stuff I didn't know where to start. Prior to campo I sold off a fair bit of my stash. So much so I was receiving messages from some scrapbooking friends worried I had packed it in. Given up. Not the case at all. I was just too overwhelmed with product.
I returned from camp mojo renewed. I have scrapped every night I have had free. And I have the resolution to have another clean out. I took to camp everything I could have needed to create layouts and I feel I can get rid of all the other "stuff".
My advice to you when you have lost you mojo and feel like giving up the scrapbooking journey. Find some sketches. Make some kits up from your stash and find some like minded people to give you a nudge in the right direction. There is always something to scrap and you have it in you to do it. Sometimes we just lose focus on what the journey is about.
Its not about having the latest greatest releases. Its about working with what you have and opening your mind.
This was my monochromatic challenge layout. I have always wanted to do a all white layout and I'm very happy with how it turned out

This challenge was to scrap about something or someone that means something to you and journal why it means so much to you. I absolutely adore this layout 

Sunday 11 May 2014

2014 project life inserts

This year I took a completely different approach to last years project life see here. My inserts I did however do myself. Kate at five at eleven had done a post at the start of the year. And one of the photos there had really caught my eye. Circular stamping. So I rounded up all my round shaped stamps (and lets be honest collected a few more throughout the year) and got stamping.

I had decided to do all my inserts this was using g page protectors. (Well except the insert pictured)

Everytime I get low. I just lay it all out and stamp some more. Yes it can get tedious but I am loving how my inserts look. With just a splash of colour on the cards from the enamel dots ive been using (I have a slight problem with enamel dots. Last count I was up to 37 packets). 


I cannot stress enough how much I am loving my inserts. Using only white cardstock and black ink. I have gotten a really cool effect that stabds out from all my weekly layouts.


Oh and in case you were wondering the brother and sister stamps and the love this girl stamps are from kellies stamps. I am in love with her stamps head on over and check out her stamps. Her blog give a girl a blog is also full of inspiration.

HAVE FUN!!!!

Saturday 19 April 2014

Ever have one of those days

Omg. I am not even sure I want to talk about it. After a great day for miss s birthday I was being proactive about tomorrows lunch. You know being easter sunday and all. And this happened. 

I resolved it by baking spuds in there instead.

However this week I (and by I, I mean predominately the children)have smashed a jar of coconut oil, smashed a bread and butter plate, smashed 3 breakfast bowls, spilt 2 litres of milk on my floor, had the birthday cake fall to bit coming out of the tin, flooded the backyard and now NOW this.

Do you feel better now. Haha.. bring on Monday and THE END OF THE SCHOOL HOLIDAYS...

I think I need a holiday

NIGHT GUYS XX

No longer a baby

Today we had a joint party with miss s for her third birthday and miss r for her 4th.  Miss r is a very dear friend whose mum offered to join our children's parties to have one big one. And what a lovely day it was.
Miss s was telling me all week that everybody was going to sing happy birthday vanna to her. When it came to the crunch she looked a bit baffled by the whole thing.
I spent the latter part of the week getting prepared. Making playdough, jelly, cakes, honey joys and chocolate crackles.
The weather was a bit iffy with intermittent rain but did that bother the children. NO. the parents. yeah a little. But you know what. It didn't matter. What did matter was that the birthday girls had a good time.
My friend made a unicorn cake while I made my own spin on a dolly varden cake. (I had a couple of mishaps with my cake, this week multi tasking was not my forte)

I'm not sure how I feel about miss s turning 3. I think its time to say goodbye to my baby and hello to my preschooler. (Or can I still claim toddler) being my last child it's bitter sweet.

Here's some snaps from our day. Thanks to everyone who made it the day It was xxx


Friday 11 April 2014

Geometric board.

One of the things we need to work on with my son is his fine motor skills.  Part of his condition means he has fingers that are quite rubbery. I have been working on a few things we can do from home in between Occupational Therapy appointments which I will post about in due time (read: when I get a chance).  One of the things I really wanted to do was make a geometric board for him to work with.

This is essentially a piece of wood covered in nails that you wrap elastic bands around.

What you need

A piece of wood cut to the size you want. I originally wanted it to be 12x12 inches however I was working with what I had so 14 inches x 6 inches is what I used.

A packet of nails. I used 1 inch nails with flat heads

A hammer

A packet of multi coloured elastic bands

A ruler

A greylead pencil

I started by cutting my wood to size and sanding the edges. I then measured out a grid witg 1.5in intervals between the markings.

I then hammered nails into the marks. I only hammered the nails in until the wood 'grabbed' the nails

I decided to spray paint the board however I went over the red paint with bursts of silver just so I could highlight where the nails were.

I went to my grandpas house to get the materials (wood offcuts and nails) so essentially it cost me 87 cents for the elastic bands and so far we have had hours of fun.

It was lovely to sit in his shed and have him work on his model planes and I creating a 'masterpiece'

Monday 24 March 2014

Camp.Paper.Scissors Feb/March 2014

Oh WOW!  I Just realised I forgot to post about my retreat I went to!

So a group of us on the Project Life Australia Group on Facebook get together twice a year to catch up and get some crafty goodness happening.  Michelle and Carol lovingly organise this camp (Camp.Paper.Scissors) and we get treated to a lovely relaxing weekend that is affordable and a great group of women.

Our abode for the weekend
This camp was at the YMCA Lady Northcote camp in Rowsley (about 20 minutes from Bacchus Marsh in Victoria, Australia).  It was a lovely setting to just relax, Big windows with fantastic natural lighting  and a large hall.  There were 33 of us staying there over the weekend, Some having flown in from the sunshine Coast in Queensland. We were able to start arriving from 4pm on Friday, as some of us were running early we met in Bacchus Marsh for coffee before heading out to camp.

This Scrapbooking is messy stuff
Upon arriving at camp it didnt take long to make a mess and get creative. We were greeted at our tables with goodie bags which are always exciting.  This year we received some brush script cards from Jodie at Polka Dot Creative, Some flair and wood veneer from Raquel at A Piece of cake Designs, An overlay and lined cards from Mary and David at Craft House, a 1/4 kit of the Strawberry kit, a 1/4 kit of the Azure kit (I fell in love with this kit) and a packet of Thickers from Spotlight, a camp.paper.scissors pencil, a tumbler with a straw, and some ribbon and twine. There were also some stamped elements that worked well as embellishments.  Quite a good haul.  The girls out did themselves this time around, THANK YOU LADIES!!!

The planning stages of my monochromatic challenge
On Saturday some of the girls attended archery, while the rest of us woke up. We were  then greeted with videos from Elise Blaha-Cripe, Wilna Furstenburg and Maggie Holmes and CHALLENGES.  There were 4 Challenges.  Scrap your Sentence (my sentence was create a layout about someone you love, and journal about why you are proud of them.), Monochromatic, Layers and Kill your Kit.  I entered a layout into 3 of the 4 Challenges running out of time for the kill your kit Challenge.  I was Pleasantly surprised when I won the Scrap your sentence Challenge as that was my least liked layout out of them all. 

Taking photos of my layouts is not my forte.  However here is my scrap your sentence Layout


My prize
 I also took a canvas class using photos from the summer with Kellie from Kellies Stamps. I love love love how this canvas turned out and I has taken pride of place in my loungeroom.  If you want to have a go at making your own visit Kellie here for her tutorial
The canvas I created in Kellies canvas Class
 It was such a fantastic weekend.  So many laughs, shenanigans and Project lifing. I achieved so much, all I need to do is add journalling to my holiday layouts.  Which one month on.... Yep you guessed it still waiting to be journalled!!! It will happen.

I really feel I have made friends that will be around for a long long time...


Sunday 23 March 2014

Viva paper pens and Enamel Dots

I am OBSESSED with enamel dots at the moment. I mean who isn't.  The problem being they can get expensive. so I started exploring ways I could make my own. the first attempt I melted pony beads in the oven. the results were quite good however, the fumes weren't great and after a bit of research I found out the fumes are toxic. So dont do that!! From an enamel dot point of view I wasn't happy with the fact you could only make one size. I like variations.
Then I came across viva paper pens. Omg my life has been changed I purchased 3 colours from Scrap Dragon to trial them and see what the results were like. I was thrilled!!! I simply made dots on my craft sheet and let then dry. The trick is to not do them too close together as you will end up with a big gloop. The paint takes a while to dry so I recommend making them at night  before bed so  they're dry in the morning.
I was so impressed, i have ordered 3 more colours. At $5.99 a pen and $6.95 postage for 3 pens you cant go wrong. It makes it much more economical than enamel dots. I also saw you can get pearl pens by the same company which is now on my wish list.


I am so so so Happy with how these turned out. do yourself a favour. Go and get some and try them for yourself, you wont be sorry. Im simply a little crafter who is absolutely thrilled with a product!!! 

The card on the left has been embellished using enamel dots where the card
on the right I embellished using dots I made with the viva paint pens

However... i emailed scrap dragon to ask if they minded me linking their store and they gave me a 5% discount code for you to use. The discount code is SCRAPDRAGON


Happy Crafting!!!

Tuesday 25 February 2014

Play dough time

I have a pet hate.

This pet hate is playdough.  I hate it getting smooshed into my carpet.  So up until recently it has been banned in my house.  When we were living in a house full of floorboards I was happy to have it around as soon as we moved into a house with cream carpet, goodbye playdough.

At our last paediatrician appointment for Master 4. She told us that due to the EDS and hypemobility in his fingers (essentially they are like rubber) that he may have trouble writing and with other fine motor skills, and an occupational therapist will have to be consulted later this year.  Before the change to Primary School.  While speaking to a girlfriend who is a primary school teacher about this she said "I know you wont like this but as far as fine motor goes, playdough is the way to go". OH MAN REALLY.

It had to be orange... Master 4's favorite colour
I procrastinated over this for a couple of days.  How do I get my head around the play dough in the carpet.... Then a couple of Saturdays ago I woke up and a friend on Facebook had a playdough activity table she was throwing out and wanted to know if anyone was interested.  OK I looked at that as a sign.  So we sadi yes please and proceeded to make some playdough.  I really like the thought of play dough from scratch,  but the recipe I have always used uses 4 TBS of cream of tartar.  Thats alot of cream of tartare, almost the whole tub.  So It comes down to remembering to buy some everytime I need to make a new batch.

At first I though Oh god what did I do wrong.  But keep stirring it will work
While perusing Pinterest (I mean who doesnt these days), I came across this recipe. and it only uses 1tsp  of cream of tartar. BRILLIANT.  I did add the essential oils, however I question as to whether adding them to hot dough will alter their therapeutic qualities. But hey I have pretty smelling playdough.


Getting Master 4's tick of approval. Actually he was
convinced I was fibbing when I said it was too hot to
 play with yet, and had to see for himself

Sunday 23 February 2014

Unfinished Projects

I am the queen on unfinished projects. Some are because I got bored halfway through, some went into the too hard basket and some were simply forgotten.

So this year I am planning on completing some ALL of my unfinished projects and making a start on my crafty wish list a couple of things I really want to do.

☆ Keep up to date with my project life. Now that I have a picturemate this task doesn't seem quite as daunting.
☆ Finish my about me album using the Heidi Swapp memory file album I was gifted last year.
☆ My children's baby albums. They are on their way but still works in progress
☆ Wedding album - this one I almost completed last weekend I just need to do a little journalling
☆My photo a day album using fat mum slims photo prompts
☆ Complete my 2013 project life 

Tasks I wish to start and finish this year

☆ I really want to try my hand at quilting. This is something I have wanted to do for a long time. Today I actually bought some material to try my hand a paper piecing some cushions for my loungeroom.  The scrapbook desk is going to be temporarily packed away to accommodate my sewing machine.
☆ A before we were us album. Contrary to popular belief before we were parents we had a life. I really want to document this.  Their is more to our story than the now

Do you have plans for your unfinished projects?  or are they going to stay sitting in a cupboard?

My goodies I bought today all ready to go.  I hope the you tube tute is as easy as it looks

Thursday 20 February 2014

Getting Messy

I lost my crafty mojo....

I'm not sure where it went but I was having alot of trouble getting back into it.  I needed it, For my own sanity I needed it.  But my get up and go had gotten up and went.  I hadn't even started project life for this year.  It was all too hard.

Then I watched a video by Heidi Swapp on My Craft Channel using stuff I already had lying around the house.  That's when I had my aha moment.  I needed to get messy.

I love getting in the zone.  Getting my hands all messy, the type of messy that leaves me with rainbow coloured hands for days.  And I love the results.  I could have done this canvas twenty times and every time the colorshine would have reacted differently with each other.  Not one of them would have looked the same.  I really find it quite therapeutic.

I tell you what once I had finished this I felt quite invigorated and ready to take on the world.  I even signed up to and nline mixed media class to expand my horizons. (thats a different blog post)

How do you find your mojo?
I adore this photo of miss 2.


Wednesday 19 February 2014

Welcoming Elhers Danlos Syndrome into our Household


Hi All,

I have drafted and drafted and drafted this post.  And to be honest I am having a lot of trouble putting my thoughts onto paper.  So I'll try again and see if i can get through this post without hitting delete again.

I never intended this blog to become a personal blog.  I wanted it to be about my crafts and things I am passionate about.  Being a mother my children are the things I am most passionate about.  Recently we have been rocked by some medical relevations.  That I'm not sure I quite have my head around yet.


For a long long time I have questioned the extent of my sons bruising and injuries.  I have been questioned about how he received the bruises.  I have been made to feel like a terrible mother when we go shopping and his head is glued together.  And it has become a running joke about how he is so accident prone.  Personally I don't find it funny.  I find it nerve racking, emotionally and physically draining and heartbreaking.  If there's something he can possibly hurt himself on he will.  His poor legs are a mottled assortment of old bruises, new bruises and scar tissue from bruises.  I'll  be honest Its not pretty.


Finally I found a doctor to take me seriously with my concerns and we ended up with the paediatric haematology department in the children's cancer centre at Monash Medical centre.  After months of extensive blood testing they ruled all the normal stuff out. At one point they were even looking at leukaemia, I said to my Husband If its not leukaemia I can deal with anything!  We got referred onto a geneticist who Diagnosed master 4 with Elhers Danlos Syndrome (EDS), Classic type.


Ehlers-Danlos syndrome (EDS), classic type is a connective tissue disorder characterized by skin hyperextensibility, abnormal wound healing, and joint hypermobility. It includes two previously designated subtypes (EDS type I and EDS type II) that are now recognized to form a continuum of clinical findings. The skin is smooth, velvety to the touch, and hyperelastic; i.e., it extends easily and snaps back after release (unlike lax, redundant skin, as in cutis laxa). The skin is fragile, as manifested by splitting of the dermis following relatively minor trauma, especially over pressure points (knees, elbows) and areas prone to trauma (shins, forehead, chin). Wound healing is delayed, and stretching of scars after apparently successful primary wound healing is characteristic. Complications of joint hypermobility, such as dislocations of the shoulder, patella, digits, hip, radius, and clavicle, usually resolve spontaneously or are easily managed by the  individual. Other features include hypotonia with delayed motor development, fatigue and muscle cramps, and easy bruising.

Source here  


Its alot for us to get our head around.  There is no treatment or cure it is something that we have to live with and live around. In November I was rudely woken up to how large this is for us.  Master 4 fell down a step and knocked his leg while on an interstate trip.  He flayed his shin open meaning an overnight stay at hospital and a plastic surgeon to stitch it back together. not so bad i hear you say... well the stitches pulled through the skin opening up part of the wound.  Then once the stitches dissolved the wound hadn't healed enough to hold closed so it opened right up again.  We then spent 11 weeks twice a week backwards and forwards to the GP to get his leg dressed and monitored.  Luckily we escaped infection but it was quite a drain leading up to the silly season.

Where do we go from here?  Having Elhers Danlos Syndrome means my son needs to stay away from contact sports and sports that put unnecessary stress on his joints.  (Early onset Osteoarthritis is a reality for us).  We will have to see an occupational therapist, as he will tire easily with his writing and other fine motor skills. Making teachers and other caregivers aware of his EDS so they can keep a closer eye on him.  We need to teach him about this so he understand why he can not play football like the other kids and have a look at other extra curricular activities that he can do.  I am looking into some natural therapies to help him with pain management as I could not think of anything worse than being doped up to the eyeballs to get through day to day.  This is not something we need to do NOW but down the track it will happen.  

So there you go.  That's the answer as to why his legs look so sore and battered.  
Do you have Elhers Danlos Syndrome? Do you know someone with it? 
 How do you cope day to day?


Thursday 23 January 2014

Documenting 2014

Last year I had alot of trouble focusing on my journalling for my project life. I had no problems printing the photos (that being said I still have empty weeks), taking photos or doing the layouts. My weakness was journalling. Why? well I think it was because the layouts the crafty fiddly bits are the fun bits. I found the journalling to be a bit of a chore.

So this year I needed to find a different approach to my project life. I found a cute little day to a page day to a page diary at aldi for $3.99. hmm we will give this a go...

So far, and yes I know its only 27 days into the year. I have written in it everyday. its not a teenage dear diary sort of journal. just points about our day, quotes from the kids, creative lists, photo prompts. im using the note section for my creative planning, and goals.

I know that some of my notes wont be applicable to my project life but at the end of the year I will have a diary to look back on and realise where we've come. Now I just need to work out how to keep little fingers out of it.

how are you planning on documenting 2014?

project life 2014

So... we are 6 (maybe 7) weeks into 2014 and I am yet to print a photo.

I have however kept a daily journal and been noting what photos im going to use. I seem to have lost my mojo a bit and I really need to find Mel time. this year I am going back to basics and using the k.i.s.s. theory (keep it simple stupid). Last year I only used core kits when I needed to do a quick catch up and pump out pages. I focused on embellishing and making my pages fun. this resulted in me falling behind with journalling as I focused on the pretty. I did however keep buying partial core kits the people were selling off leaving me with quite a stock of core kit partials. and two albums exploding at the seams for the year. which is fine. But if you look at the big picture say 10 years of project life and there is 20 albums, plus my traditi8nal albums. I have been scrapbooking (as opposed to the dabbling I did prior) for 3 years and I already have 10 full albums and two 'in the process albums' on the go so in the grand schemem of this 1 project life album a year is ideal.

SO using this mind set I have preloaded my pages with project life cards. A kit per month. and the only embellies I will be using is stamps, rub ons and other flat embellies NO BULK.

  I am going on a retreat with a group of girls from the Project life Australia facebook group in two weeks and will be using that time to complete 2013 and kick start my 2014.

What are you using to simplify this years album? what did you learn last year that you will do differently?

stamp storage

I have a confession to make.

I love clear stamps. It is safe to say I am addicted to them. I prefer photo polymer (and love love love the smell of them) but if I find nice acrylic stamps that I must have I will buy.

The problem with acrylic stamps is storage. I have seen people use clear DVD cases to store them or Avery clear pockets. But with the amount of stamps I have I feel I need to have a system to store them that condenses the room that take up.

A while ago I came across this tutorial from mercy tiara on stamp storage and I just knew this was what I needed to keep them all together.  In this tutorial she keeps them in baskets on her desk but with my limited craft space I decided to punch holes in it and store them in a lever arch folder. And you know what? They fit nicely in my expedit with my albums.

What you need

2 a4 sheets of transparency
1 a4 sheet of white card stock
A hole punch
Masking tape or washi tape
Double sided tape

Start by adhering 1 piece of transparency to the piece of card stock.  Peel your stamps off the plastic they are on and place them the way they are on the plastic onto the left side of your transparency. Place the remaining piece of transperency over the top of the stamps. Using washi tape or mask in tape tape along the bottom of the page to stop stamps from falling out the bottom. Turn over and using double sided tape the printed piece of plastic to the card stock lining it up with where you placed the stamp. I also write under the price of printed plastic what brand of stamps they are for reference.  Punch holes in the page and put it in your binder. You can fit 3-4 stamp sets on the page this way. And then just flick through the binder to see what to use.

I love this style of storage. so much so I am about to start my third folder. I also have a binder I take to crops with just the stamps I need in it.

How do you store yours?

2014. jumping into it.

So, somehow, somewhere, 2013 ran away with me. Family happened, Injuries happened and getting my blog up and running fell by the wayside. I didnt want that to happen it just sort of did. 2013 was a big emotional rollercoaster, but 2014 is time to stop making excuses and just get it done.

So I sat down and asked myself, why do I want a blog? I have seen so many people with grand plans of having a creative, family related blog for it to turn into a diary type thing where they use it to complain and whine about their friends family and life. do I want that? no.
do I want to share my passion with creating? yes.
would I like to include some little insights to my household while keeping it a little private? yes.
do I want to use the blog as a motivator to keep up to date with my project life? yes.
and find some fun messy way to traditional scrap and share them with you? yes.
would I like to apply for design team roles? sure I would, however the blog is only part the reason of my not applying for dt. I lack confidence in my skills. everyone else loves what I do heck I love what I do but displaying for 'advertising' purposes? what if they dont like it? what if im not wanted? can i handle the rejection? i'm not 100% sure how to cross that hurdle. but hey.  why dont we try!

so what is stopping all this from happening? I am whats stopping it. I am so time poor its ridiculous but this year I need to take the time to realise whether I am time poor or if I create my time poor by procrastinating?

so this year it is on my to do list to get this blog up and running. no I might not have many readers but its nice to know that I have a little corner of the world where I create.

happy crafting people. I will check back soon